Query Data using Amazon Athena
Prerequisites
- Amazon Web Services account
Introduction
In this post we will upload some data to an Amazon S3 bucket and run a query on it using Amazon Athena.
Amazon Athena is an interactive query service that makes it easy to analyze data in Amazon S3 using standard SQL. Athena is serverless, so there is no infrastructure to manage, and you pay only for the queries that you run.
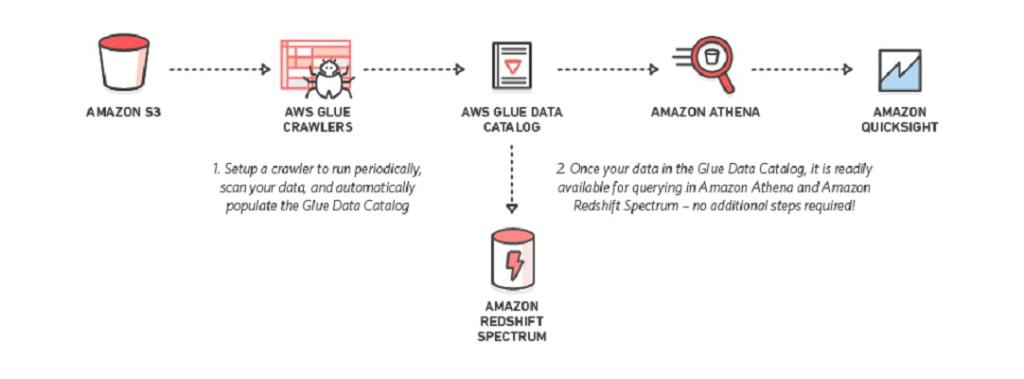
How it works is as follows,
- Data sources put data into Amazon S3, data formats can be JSON, CSV, Avro, ORC or Parquet.
- Amazon Glue Crawlers run periodically or on demand to crawls your data sources, identifies data formats, and suggests schemas to store your data.
- It then populates the Amazon Glue Data Catalog.
- Once in the Data Catalog, the data is ready to be queried by services like Amazon Athena or Amazon RedShift Spectrum
Upload Data to Amazon S3
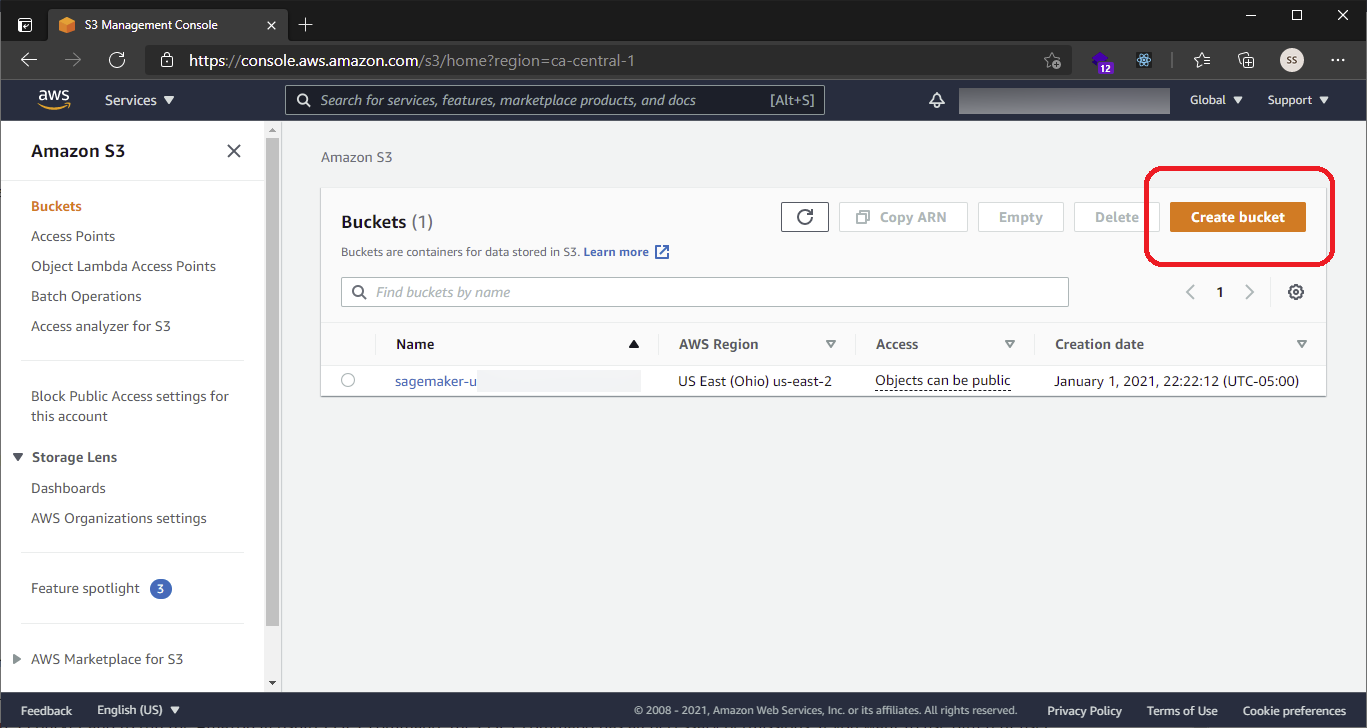
Sign in to the AWS Management Console and open the Amazon S3 console at https://console.aws.amazon.com/s3/
Click Create Bucket.
In the Bucket Name box of the Create a Bucket dialog box, type a bucket name.(The bucket name you choose must be unique among all existing bucket names in Amazon S3).
Select a region.

Leave all other settings as their default settings and click Create Bucket.

When Amazon S3 successfully creates your bucket, the console displays your empty bucket in the Buckets panel.
Create a folder called data.
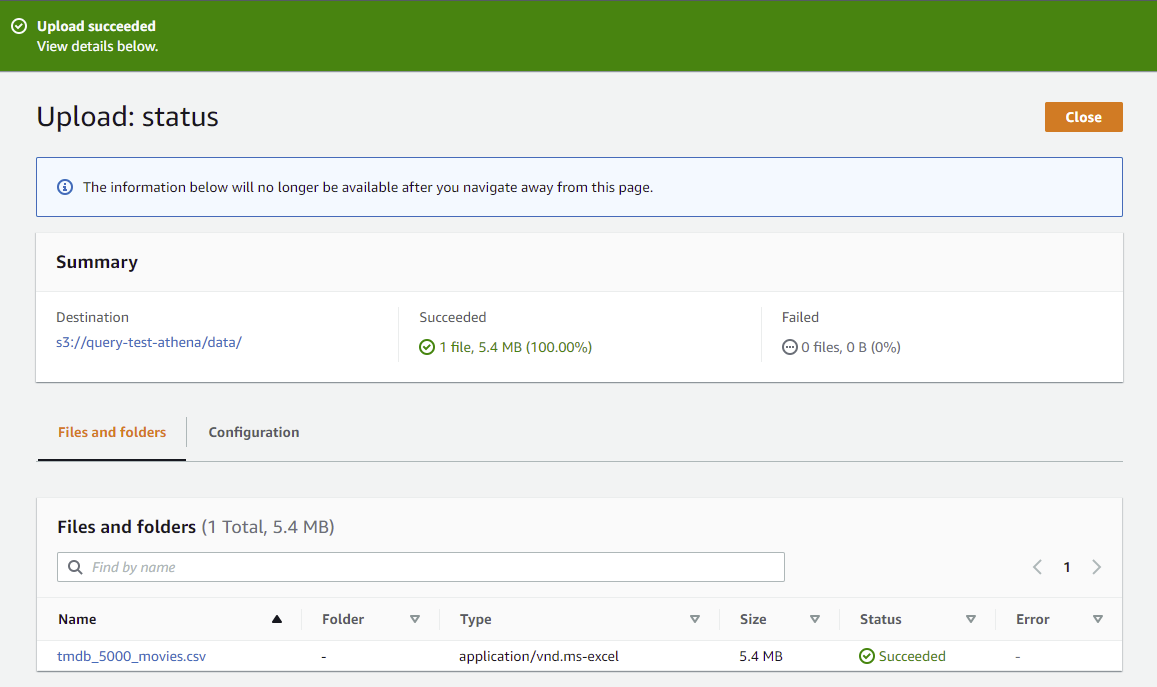
Upload the data file to the new Amazon S3 bucket into the data folder. You may get the data file from Kaggle - I am using the TMDB 5000 Dataset in this example.

Once successfully uploaded you may close the status page.
Amazon Glue
AWS Glue is a serverless ETL service that makes it easy to discover, prepare, and combine data for analytics, machine learning, and application development.
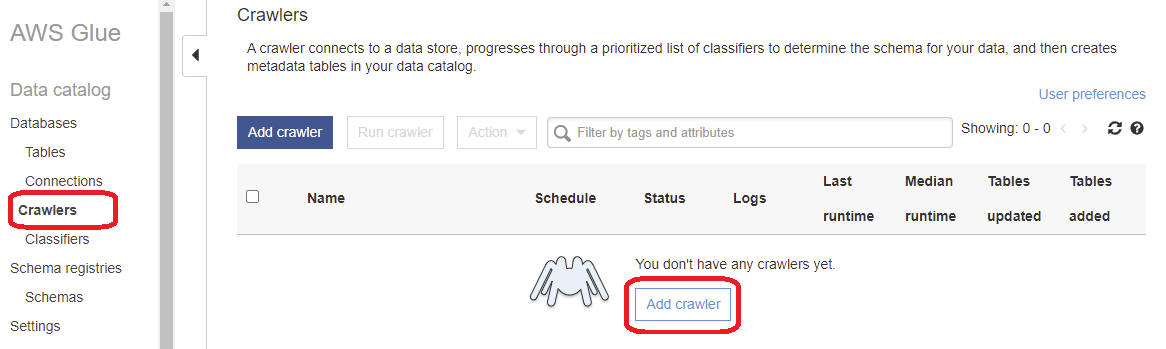
Add a Glue Crawler called movie_data_crawler.
Choose Data Stores for crawler source type. Select ‘Crawl new folders only’ and click next.

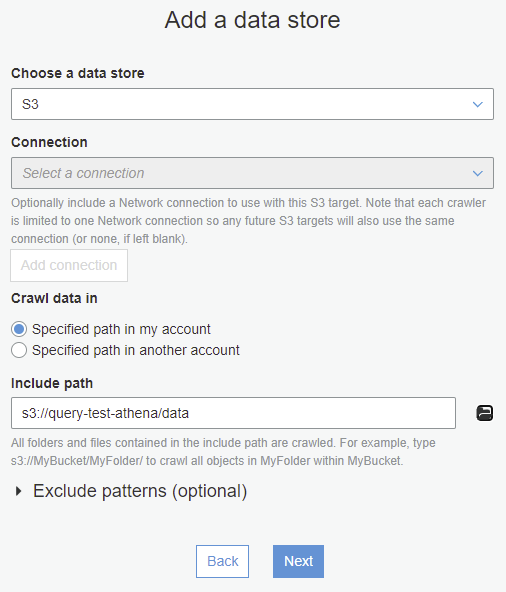
For data store type choose ‘S3’ and select ‘Crawl Data in specified path in my account’. In the ‘Include path’ field, select the folder to the data file in the S3 bucket. Click Next.
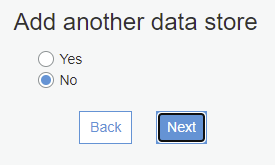
Select ‘No’ when prompted to ‘Add another data store’, then click next.
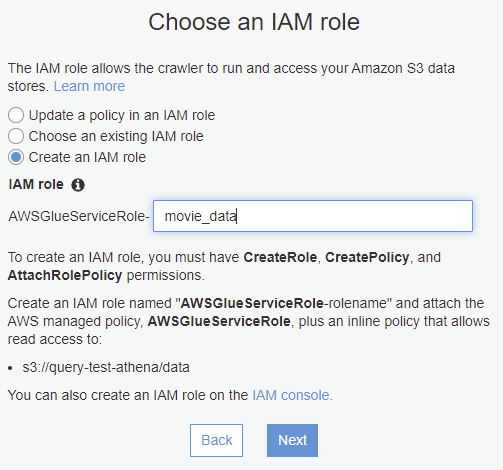
Choose an existing IAM role or create a new one. In this example I had to create on and named it ‘movie_data’. Click Next.
Create a scheduler for this crawler. Here you can choose the frequency to run the crawler such as daily, monthly, hourly, etc. depending on how frequent you think the data source will receive new data. For this example we will select ‘Run on Demand’, since we won’t be adding new data after the initial run.

In the next screen, configure the crawlers output. Select a database or create a new one. This database contains all tables created by this crawler in your data catalog. In this example we create a new one called ‘moviedatabase’. Leave all other settings as their default values.

Click Next to review all your settings, then click Finish.
The crawler is now created and ready to run. Select the new crawler from the list and then click the ‘Run crawler’ button.
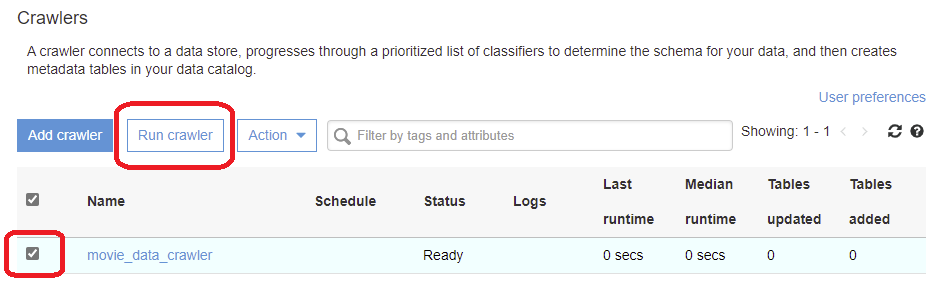
The status of the crawler will then change from ‘Ready’ to ‘Starting’. Once complete it will enter a ‘Stopping’ state and then finally become ‘Ready’ again. The status message should read - ‘Crawler “movie_data_crawler” completed and made the following changes: 1 tables created, 0 tables updated.’

Click on ‘Databases’ on the left navigation pane.

Select the ‘moviesdatabase’, then ‘tables in moviesdatabase’

From the next screen click on the table ‘data’ to view the table and properties.

The schema should look like this, with the columns names that match with those in the CSV file we uploaded.
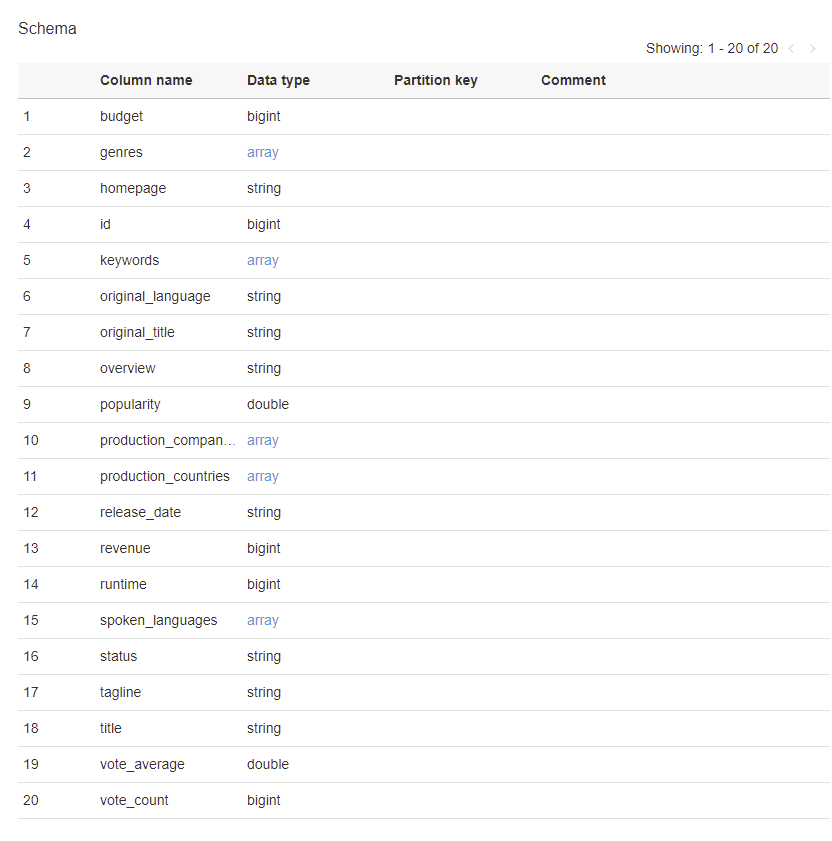
In case some of the data types were added incorrectly by the crawler, you can edit the data types for each column by clicking ‘Edit Schema’.
Query the Data
Before you run your first query, you need to set up a query result location in Amazon S3 to store the output of the query.
Go back to the Amazon S3 bucket and create a new folder called ‘athena-output’
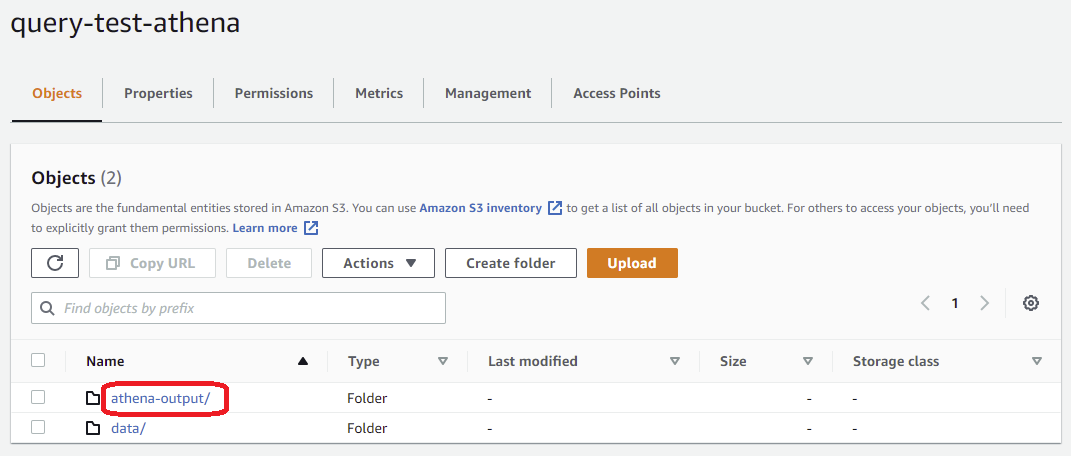
Once the folder is added, copy the S3 URI by clicking the button ‘Copy S3 URI’ in the upper right corner and save it for the next step.
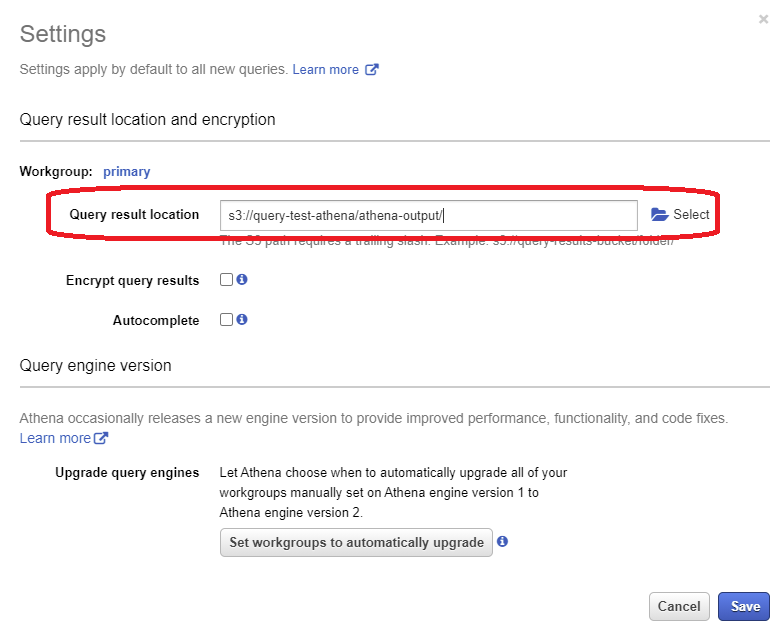
Switch to Amazon Athena service and click ‘Get Started’. In the settings, select the S3 folder (or paste the URI from previous step) and click ‘Save’.
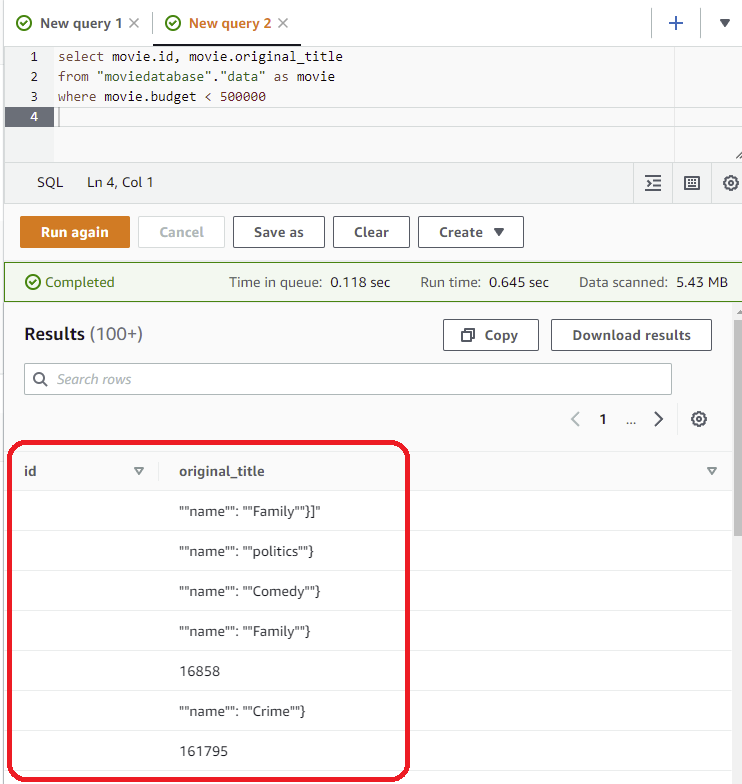
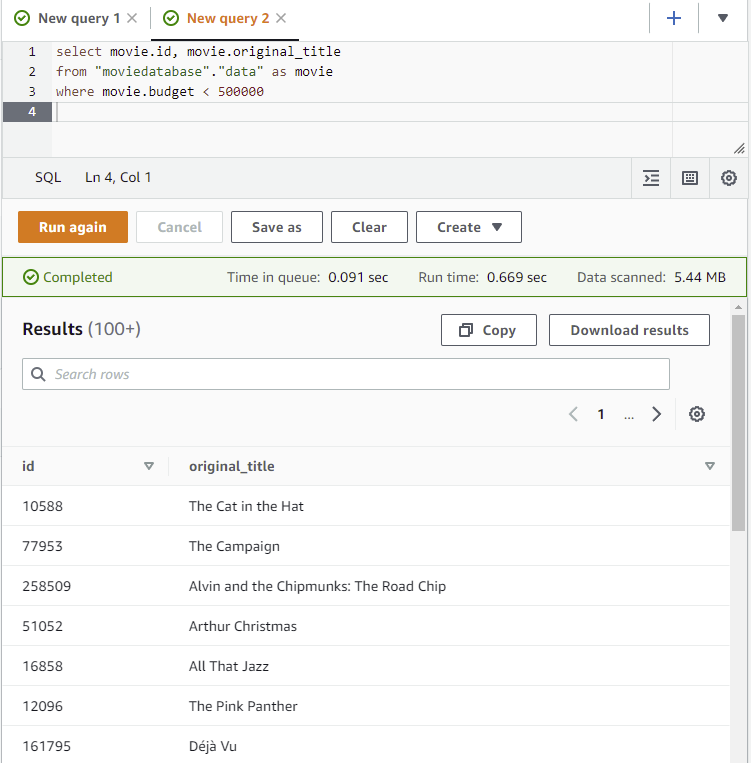
Now we are ready to query the data. In the query editor, write a simple query like - get all movie id and title where the budget is less than $500,000.
select movie.id, movie.original_title
from "moviedatabase"."data" as movie
where movie.budget < 500000
If you try this queries, you will notice it gives incorrect results. The data is not being returned in the correct columns. This is because the data was not parsed correctly.
Fix the Data
The problem above is because of the delimiter. The original dataset uses the comma as a delimiter to indicate the columns in the tables. However the comma occurs inside the text of certain columns such as in the text of the ‘overview’ column.
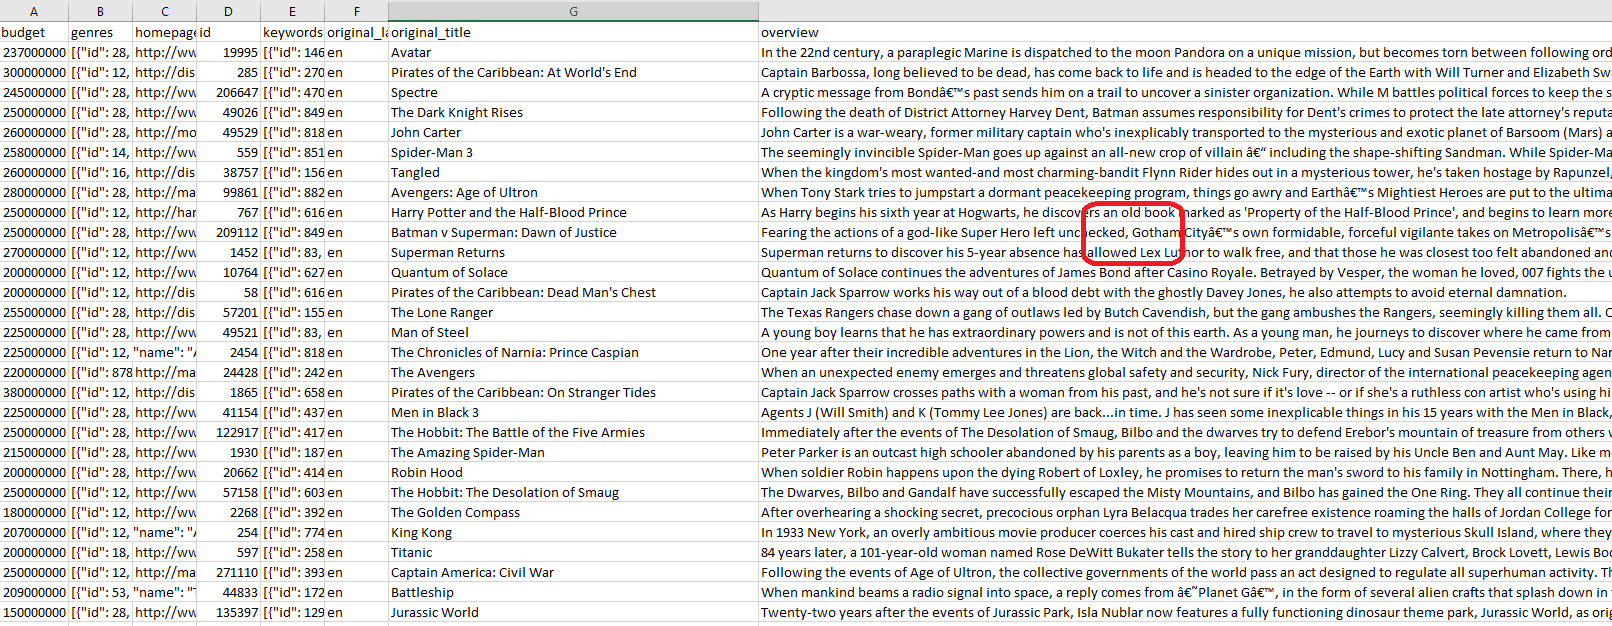
At the time of writing this it appears that the crawler is having problem recognizing the column delimiter from the comma inside the column text.
I could not find an immediate solution to this using Amazon Glue, so to solve the problem I changed the delimiter to a tab and uploaded the new tab delimited dataset (overwrite or remove the old datset in the S3 bucket since we don’t want it to be crawled by the crawler).
With the new data file uploaded we have to rerun the crawler.
But first we need to create our own classifier so that it can parse the data according to the new delimiter.
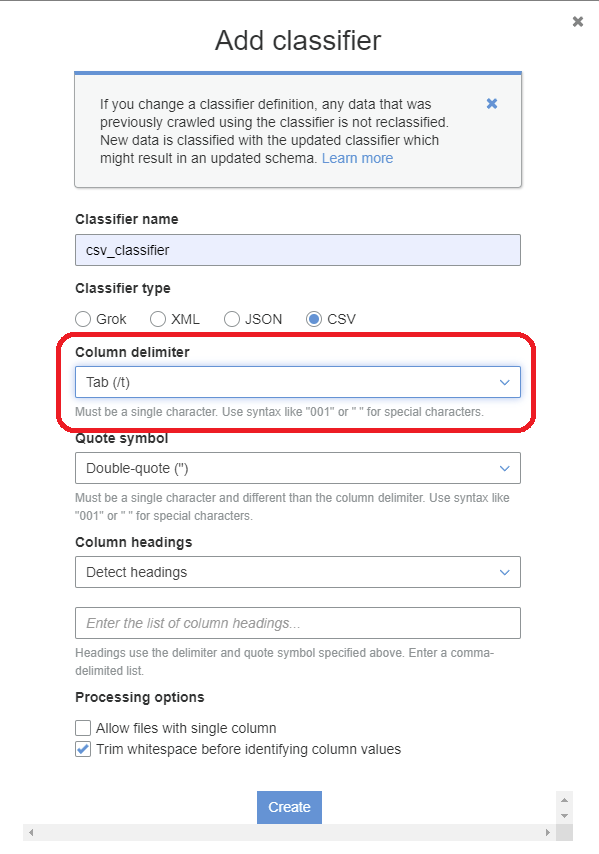
Click on ‘Classifier’ under ‘Crawlers’ on the left side menu. Then click Add Classifier.

Name your classifier as ‘csv_classifier’ and make sure to select Tab as the delimiter and click ‘Create’.
Edit your crawler and select the new classifier.
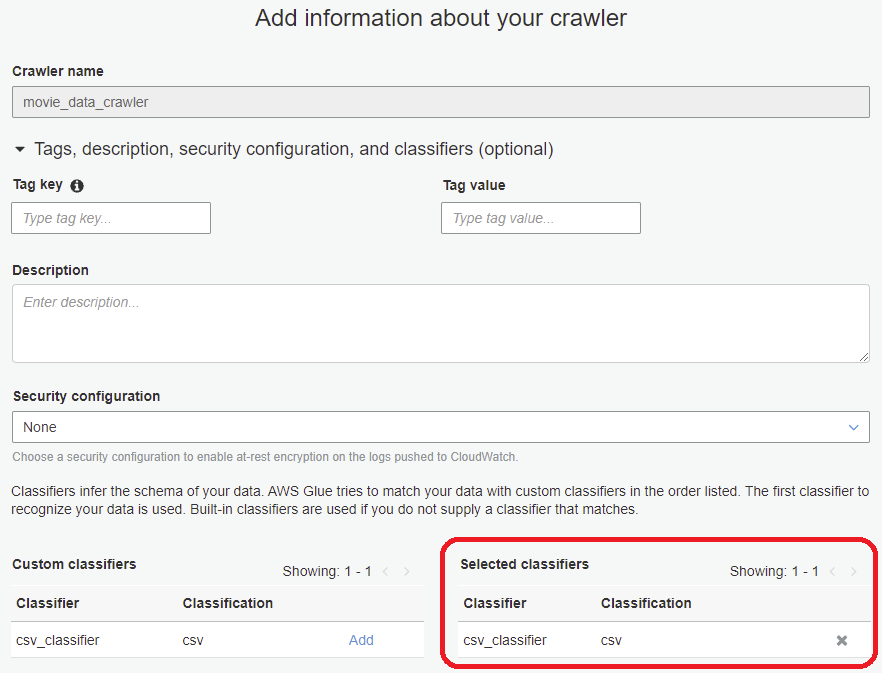
After saving the changes. Run the crawler. This will update the schemas and regroup the data into the tables.
Go back to Amazon Athema and run the above query that failed. This time the results look much better. The data is in the right place and each of the movies returned are indeed those with budget less than $500,000.
References
Salvatore S. © 2020