Restore Packages From a Private NuGet Server
Description
I was recently creating a new build pipeline for a project on Azure DevOps, but ran into a problem. My company uses a private NuGet server which is only accessible from inside the company intranet. The project I was building referenced a few NuGet packages that were only available from this private server. Forgetting about this fact, when I first tested the pipeline one of the tasks failed - that is the NuGet Restore task.

Since I was using Azure pipelines with Microsoft-Hosted Agent, this wouldn’t work, there was no way for the agent to access the private server. One option would be to push the required packages to a feed on Azure, essentaially creating a NuGet feed on the cloud that the agent can access. But then you would end up with two package sources and that might become a maintenance nightmare. Alternativey you could just move everything to Azure, but my company wasn’t ready to do that so this post will show how to get around this issue using Self-Hosted Windows Agents.
Prerequisites
- Azure DevOps account
- Created a Project within an Organization
- Local NuGet feed
- Windows environment for running the Windows Agent
Create a NuGet.config
If you don’t already have one, create a NuGet.config file and place it in your project at the solution or project level.
Add a source for your local NuGet server, for example
<add key="local" value="http://myserver/NuGet/nuget" />Place this in the packageSources
<?xml version="1.0" encoding="utf-8"?>
<configuration>
  <packageSources>
    <clear />
    <add key="local" value="http://myserver/NuGet/nuget" />
  </packageSources>
</configuration>
Make sure the changes are commited to the correct branch and pushed to your remote repository.
Create a Pipeline

Click on Use the Use classic editor link to use the GUI to create pipeline (you can also do this using YAML)
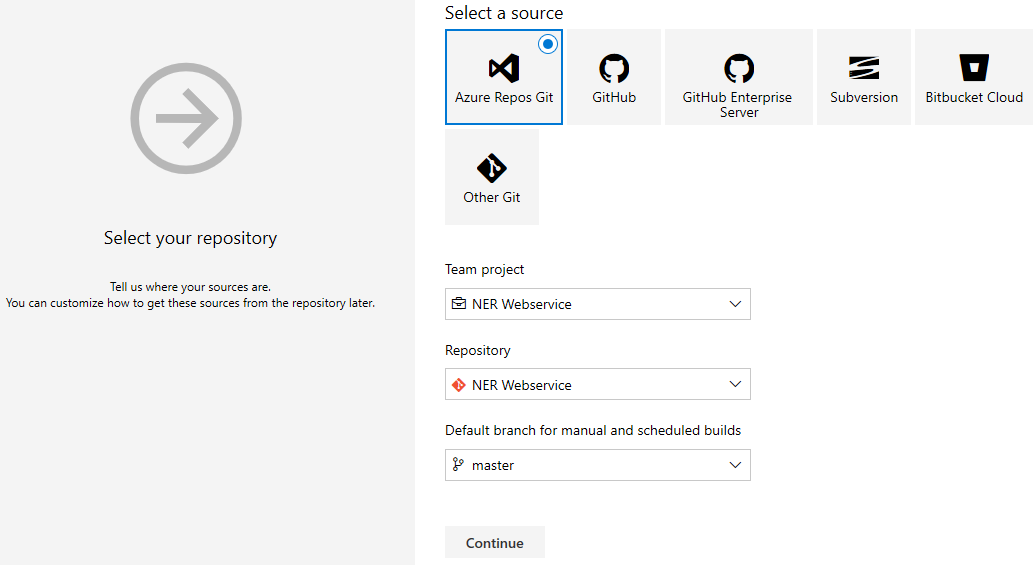
Select Azure Repos Git as your repository, and the correct repository from the drop down.
Select a template or create one from scratch. Since this project is an ASP.NET website we will pick the template for ASP.NET, then click Apply.

In the new pipeline click on NuGet restore
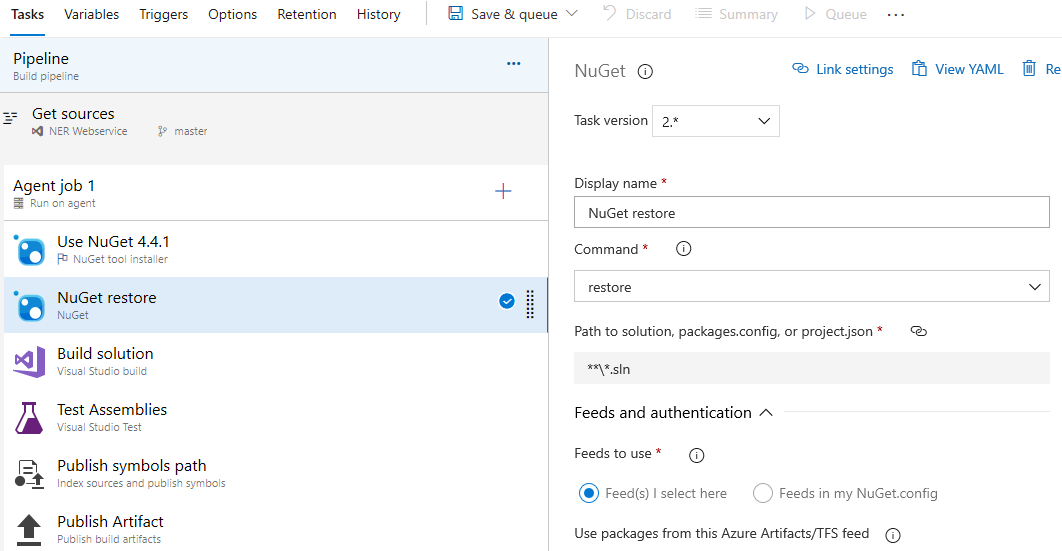
Select Feeds to use - Feeds in my NuGet.config.
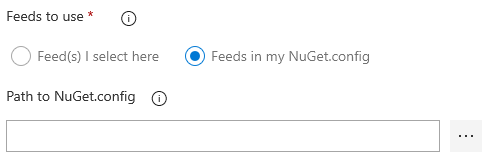
Then in the popup select the nuget.config file from your project.

Save the pipeline.
Set up the Self-Hosted Agent (Windows)
To build your code or deploy your software using Azure Pipelines, you need at least one agent. This agent will run on the machine you install it to. You can install the agent on Linux, macOS, or Windows machines. You can also install an agent on a Docker container. These instructions are for installing to Windows.
Make sure your machine has these prerequisites:
- Windows 7, 8.1, or 10 (if using a client OS)
- Windows 2008 R2 SP1 or higher (if using a server OS)
- PowerShell 3.0 or higher
- .NET Framework 4.6.2 or higher
Authenticate with a Personal Access Token (PAT)
Sign in with the user account for your Azure DevOps organization. On the top right click on profile icon and click Profile.

Then click on Personal access tokens under Security

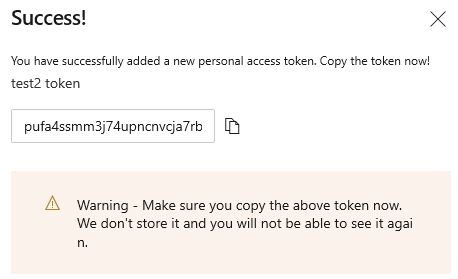
Add a new token, and Select custom scopes (Note: you need to click the link to show all scopes to see the ones mentioned in the documentation)
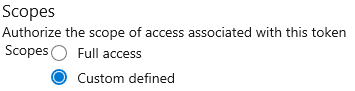
For the scope select Agent Pools (read, manage) and make sure all the other boxes are cleared

Click create and Save the token before closing
Check permissions
Make sure the user account that you’re going to use has permission to register the agent.
Download and Configure the Agent
From Azure DevOps organizaion page Click Organization Settings at the bottom left.

In the section titled Pipelines select Agent Pools

Select the Default pool, select the Agents tab, and choose New agent. (or you can create a new pool and add the agent to that)
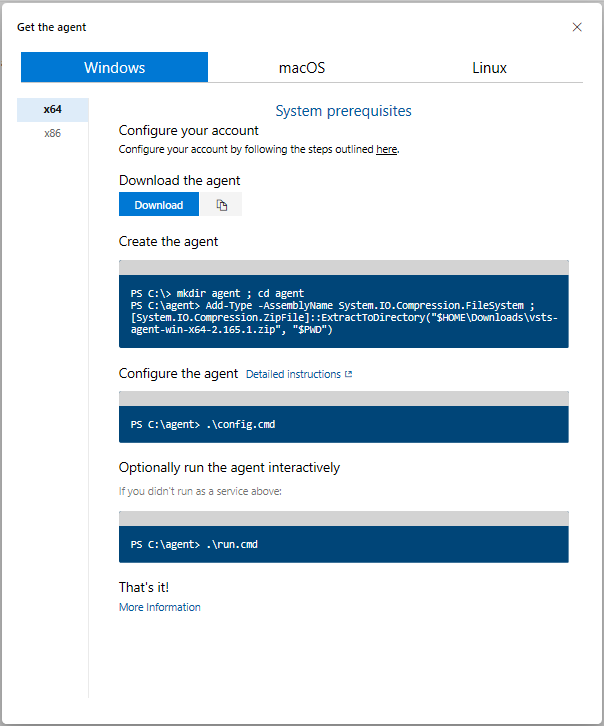
Click download and Save the agent (it is a zip file)
Unpack the agent into the directory of your choice. Then run config.cmd. This will ask you a series of questions to configure the agent. In the documentation it says
We strongly recommend you configure the agent from an elevated PowerShell window. If you want to configure as a service, this is required.
Since we will run it as a service open an Admin powershell window. Then change directory to where you extracted the agent zip file and run the command
.\config.cmd

Answer the questions as follows
Enter server URL >
Enter authentication type (press enter for PAT) >
Type enter for PAT
Enter personal access token >
(enter the token saved previously)
Enter agent pool (press enter for default) >
Press enter since we are using Default
Enter agent name (press enter for MYWS001) >
Press enter to select the default name (computer name)
Enter work folder (press enter for _work) >
Press enter to select the default folder
Enter run agent as service? (Y/N) (press enter for N) >
Enter Y to run as a service
Enter User account to use for the service (press enter for NT AUTHORITY\NETWORK SERVICE) >
Press enter to accept the default user
You should see the following output
Granting file permissions to ‘NT AUTHORITY\NETWORK SERVICE’.
Service vstsagent.YourOrganization.Default.MYWS001 successfully installed
Service vstsagent.YourOrganization.Default.MYWS001 successfully set recovery option
Service vstsagent.YourOrganization.Default.MYWS001 successfully set to delayed auto start
Service vstsagent.YourOrganization.Default.MYWS001 successfully configured
Service vstsagent.YourOrganization.Default.MYWS001 started successfully
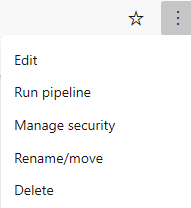
Go back to your project on DevOps and in Pielines Show all and edit the new pipeline
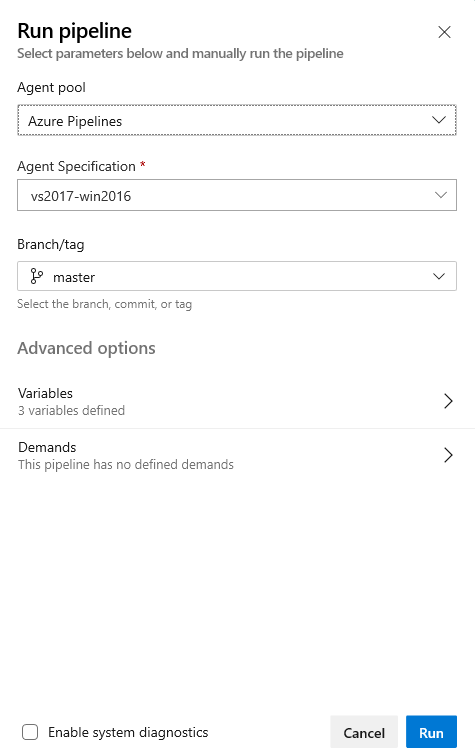
Click Agent job and on the right under Agent pool select the Default Pool

In the pipelne click Save and Queue

(To see the new agent, Click on Manage This will take you to the Default pool If you click on the Agents tab you will see the new self hosted agent that was created.)
Click Run in the popup
You should see all steps in the pipeline succeed.

References
Salvatore S. © 2020